Destiny 2 players have been asking for puzzles for quite some time, and the Imbaru Engine certainly delivers.
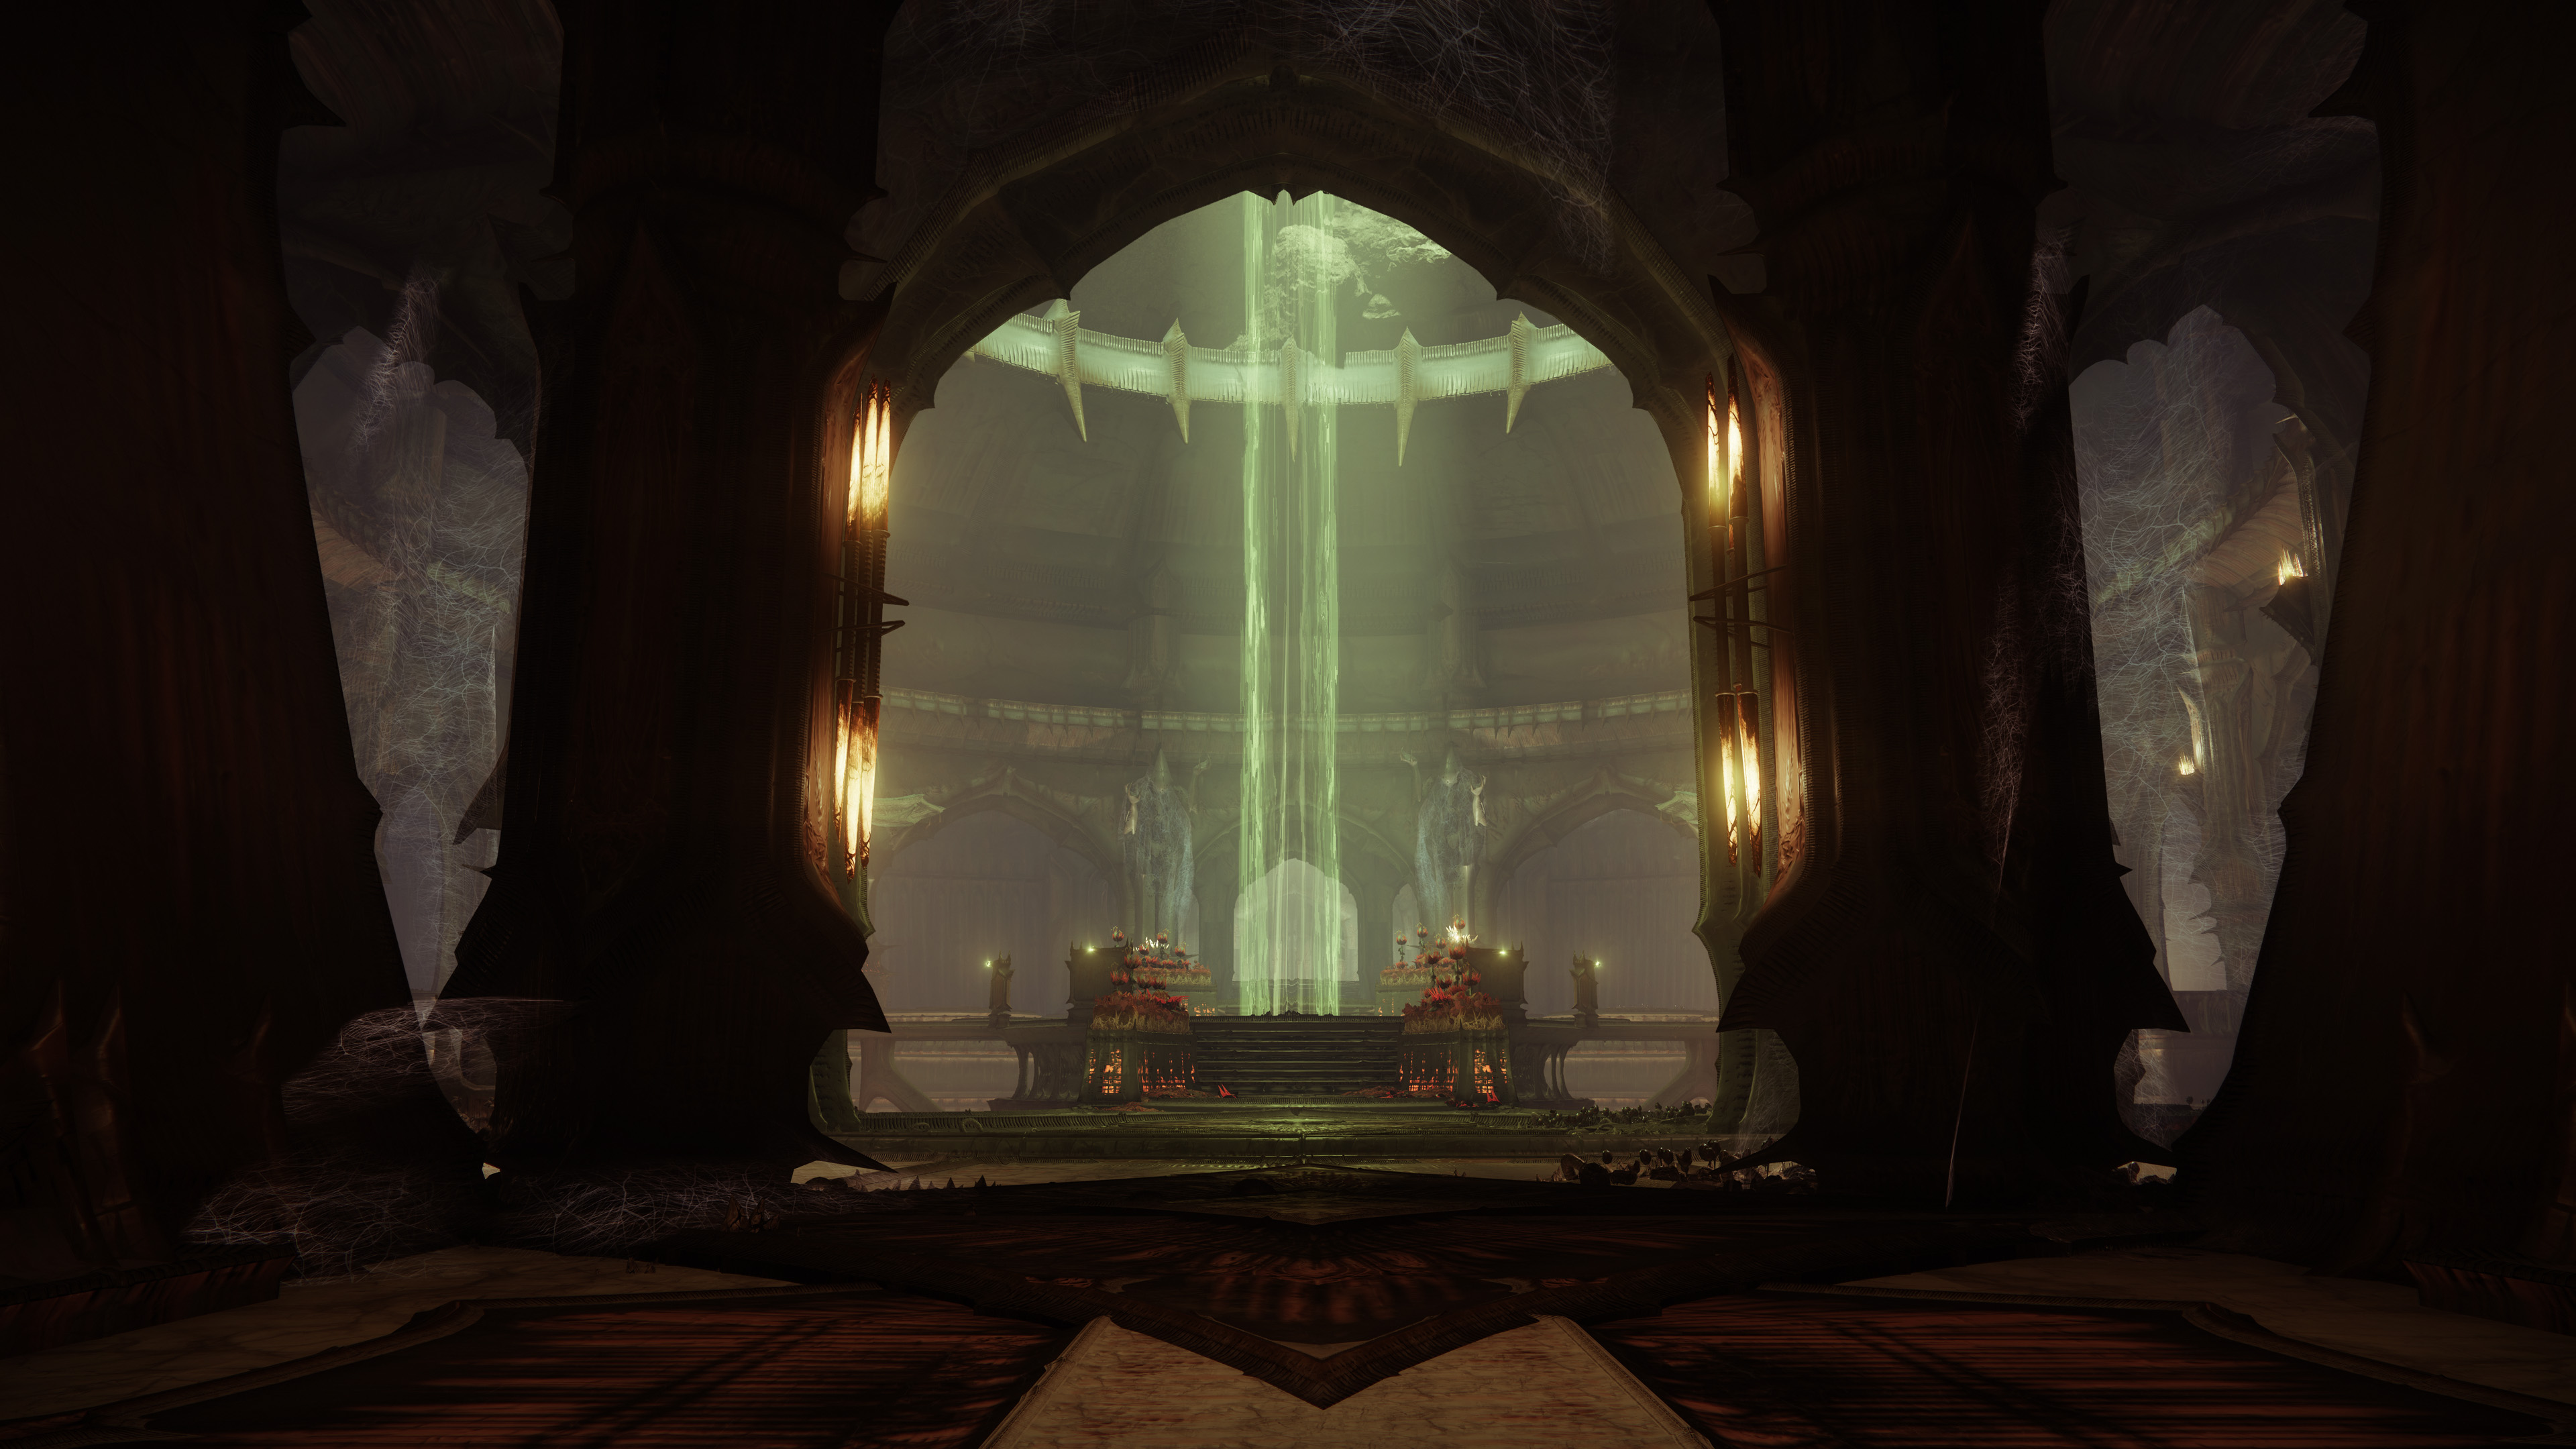
This cryptic, inverted room will remind you of the second encounter in Prophecy or of Christopher Nolan’s Inception, and navigating it can be just as tricky as you’d expect from a challenge made by the Witch Queen herself.
The Imbaru engine gives Savathûn part of her strength. As the Hive God of Cunning, she feeds her worm through trickery and deceit—and you just got a golden ticket to the epicenter of her machinations. Savathûn will test you once again through a series of cryptic puzzles, and you can’t let her fool you. If you fail, you die, and though your death has very few repercussions here, the fact that Savathûn got a leg up on you as you hear her cackle hurts more than a kick from Rhulk.
Solving the puzzles in the Imbaru engine can be complicated if you don’t know what to look for, and even if you do, it may still stump you. Here’s our Imbaru Engine guide so you can complete this activity quickly and advance the seasonal story.
How to complete the Imbaru Engine in Destiny 2
The Imbaru Engine requires you to outwit Savathûn and open the chests tied to the correct Hive rune. Each chest will have a symbol close to it as a hint, and you need to figure out which ones will get you some progress and which ones will get you killed. Before you begin, we recommend equipping the Treasure Hunter mod on your Ghost (or any mod that shows the location of region chests). This lets you see where all the chests are and makes your life far easier. Strand also helps a ton when it comes to navigating the area.
As soon as the activity starts, you’ll have to make your way to the Imbaru Engine itself, which is located above the Oubliette where the seasonal activities take place. Once you’re inside, the game will tell you to begin the test and show you two chests. Each has a Hive symbol next to it, and you need to pick the correct one to advance. So far, we’ve only found one way to spot the correct symbol: trial and error.
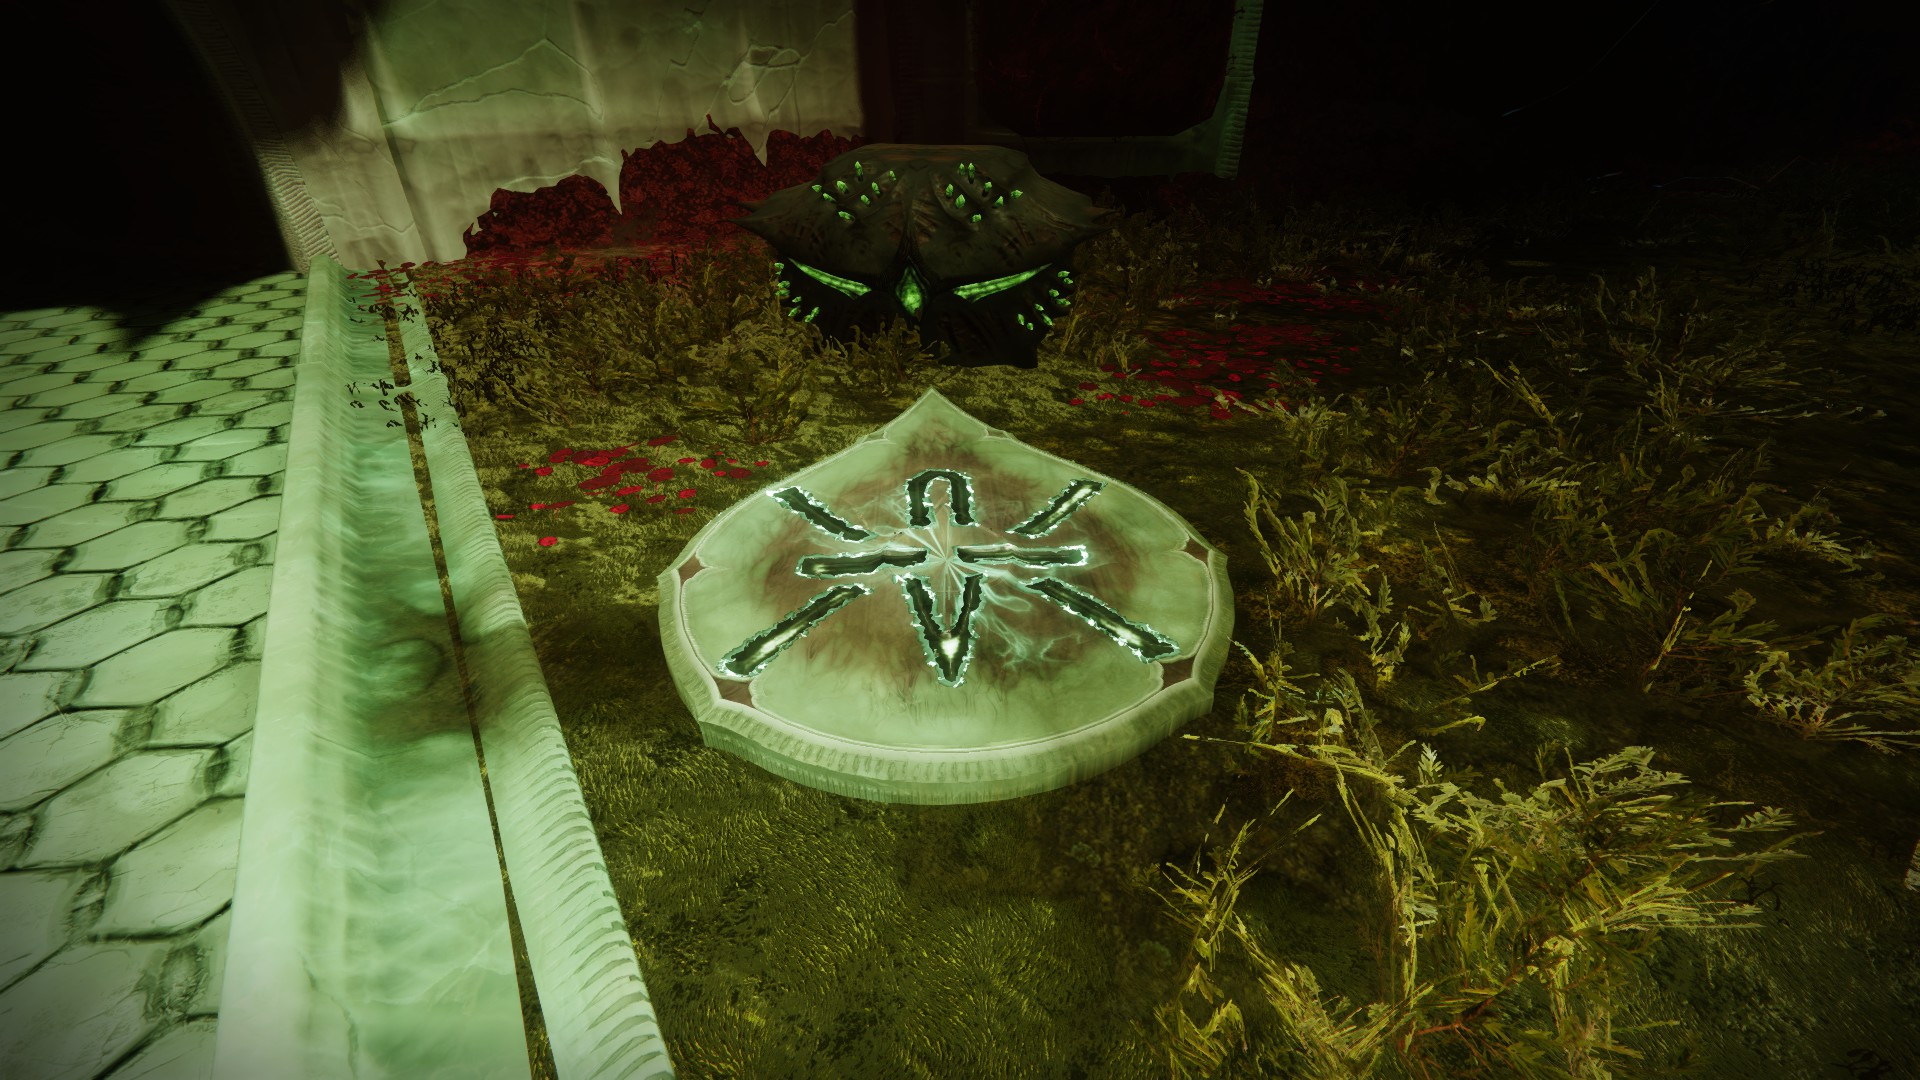
For the first week, the symbol you’re looking for is the one that looks like a piece of barbed wire, or like an X with a dagger through it. This is the correct symbol, and interacting with chests marked by the other rune will just kill you (though there doesn’t seem to be much penalty for falling prey to Savathûn’s schemes here).
Interact with the chest that has that symbol and you’ll advance to the next stage of the Imbaru Engine puzzle. Now, you’ll need to interact with two correct chests out of the three that spawn. Turn around from where you began and you’ll see a marker on your HUD pointing you to the other side of the room.
There will be three chests on a walkway. Two of them have a plate with a Hive rune right in front of them, while the other one shows the marking on a small hedge across from it. Again, interact with the two chests that have the correct rune.
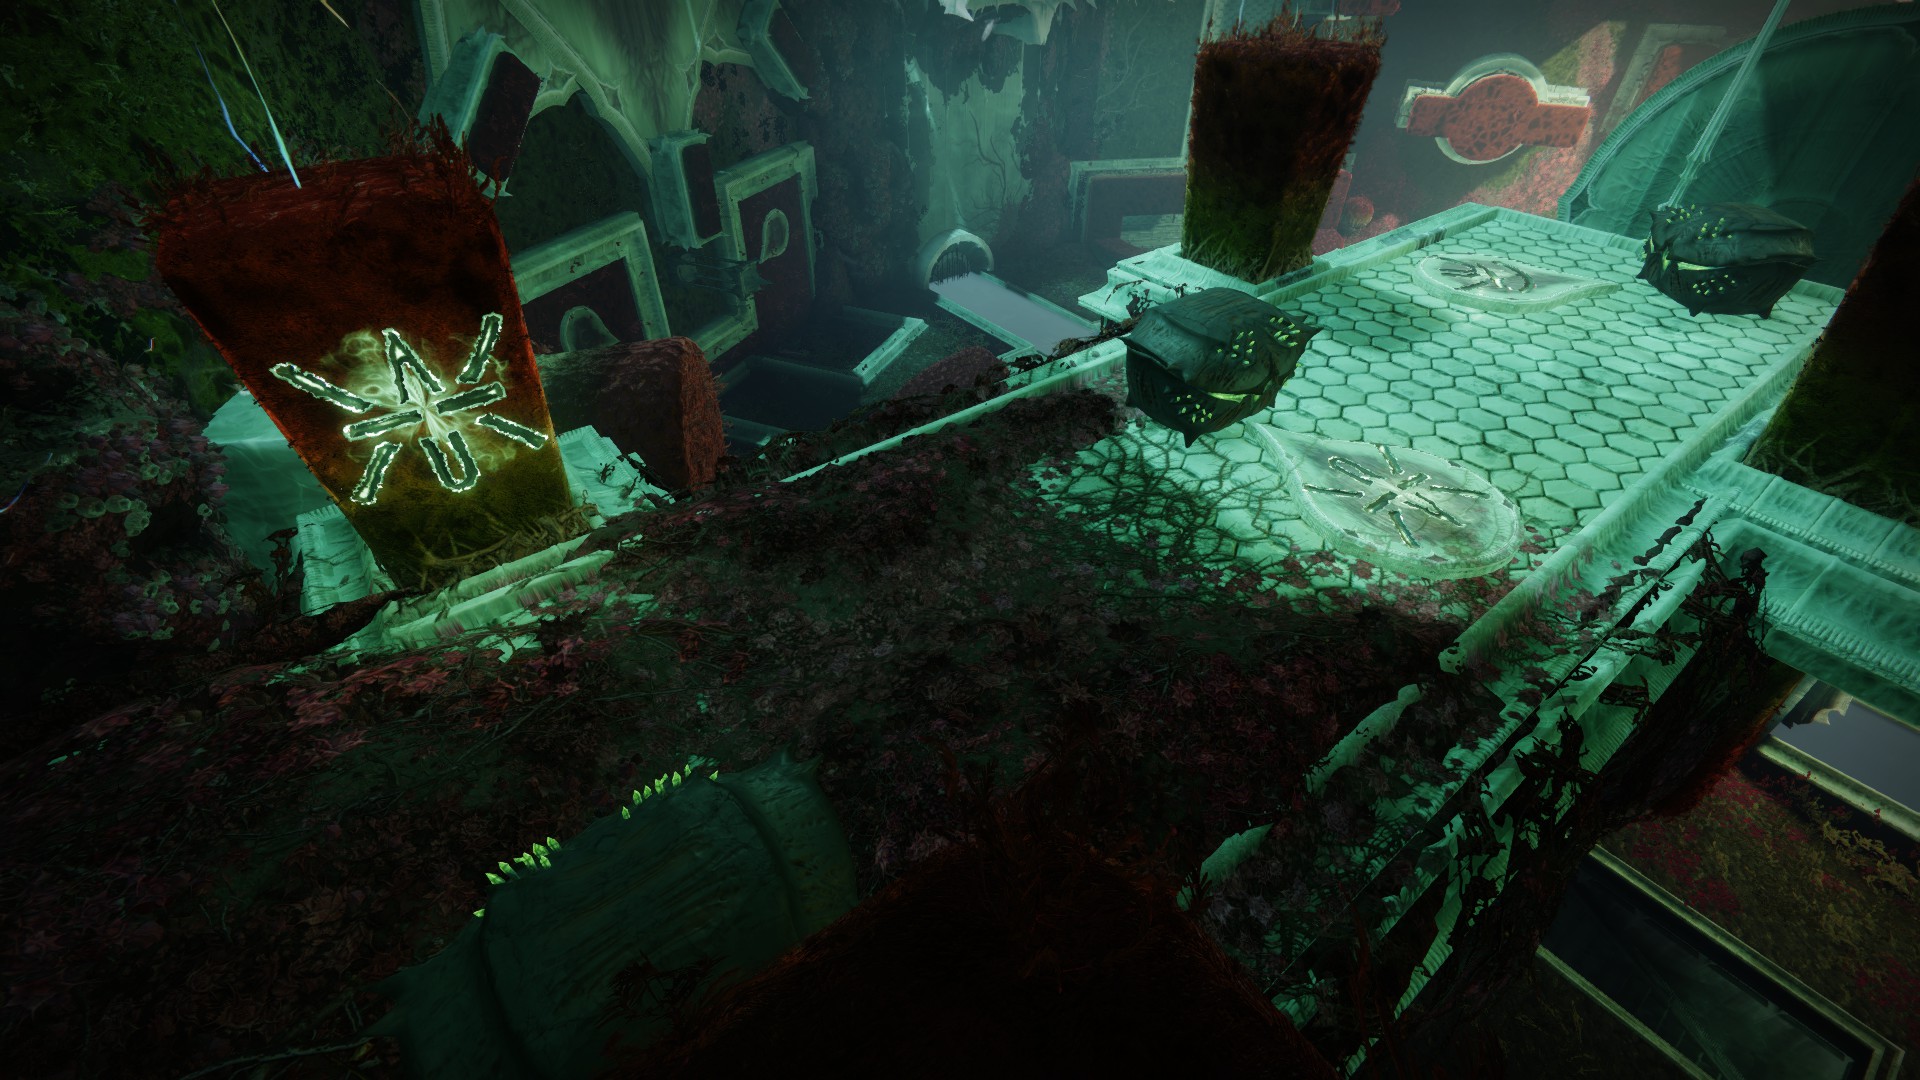
This is the part where the puzzle becomes far more complicated. Once you’ve wrapped up the second stage, you’ll have to find three chests with the correct rune. They’re spread out all over the arena, and now, there are far more wrong ones than there are right. Here are some of the locations we’ve found. If we missed some, the symbols are generally close enough to the chests that you may not have too much trouble finding them.
- The one across from you: The chest is leaning against a vertical plate. Look on the other side to see the symbol.
- The pair of chests slightly to your right: Look on the opposite side of the wall that they’re stuck in. The point of each plate works as an arrow, so follow that to know the correct chest (e.g. the Hive rune on the right will point to the chest on the left, and vice-versa).
- Directly below you: Drop down onto the floor, then look straight up to see this one on the “ceiling” (i.e. the underside of the walkway you just dropped from).
- The two chests on the ground and to your left: the plates with the Hive runes are above each chest. Again, each plate is pointing to the other side.
- Slightly above you and to your left: The Hive rune is on a hedge above the chest. We recommend walking a bit forward to see this without much effort, and the chest across from you works as a solid vantage point.
- Slightly above you and to your right: On the hedge that’s propping up the chest, stand in front of the chest and face the Imbaru Engine. The rune will be on the right side of the hedge on which you’re standing, but you can also travel a bit farther to the right to see this.
- Above the Imbaru Engine: This one feels like it’d be tricky, but it’s actually not too terrible. Grapple onto the Imbaru Engine, then look for a marking on the inner ceiling.


After you’ve found all three correct chests, the mission will end and you’ll get some seasonal drops for your trouble. Our first clear got us two Witch Engrams and one Witch’s Key, which isn’t bad for a little work, but subsequent completions gave us nothing.


Published: Sep 19, 2023 06:05 pm