After Cyberpunk 2077‘s 2.0 update, graphics requirements have changed drastically for the game, and people who previously had found their system’s best settings will have to enter the drawing board phase once again.
Ultimately, this is a good thing. In addition to tons of positive gameplay and system changes, the new update allows the game to look significantly better—without significantly increasing power demands from your PC. Still, it can be frustrating to try to sort through all of the different graphics settings in a game to test them all out, especially in a game with as many different options as Cyberpunk has. Don’t worry, we’ve got you.
Cyberpunk 2077: Best graphics and video settings
Cyberpunk actually has two different areas that you can customize visual settings—graphics and video.
- In Graphics, you’ll find settings that have to do with rendering resolutions and object density. These settings will have a significant affect on your game’s performance.
- In Video, you’ll find more optional and preference based settings—such as V-Sync and film grain. These are more about visual preferences, but some settings here can affect performance.
The best graphics settings for performance
In this section, we’ll give you the best graphics setting for mid- to low-end PCs that can’t just turn everything to ultra and enjoy 120 FPS. Because there are so many different settings that can be altered in Cyberpunk 2077, even low end PCs can run the game well while preserving a beautiful look, but only after some tweaking. These are the settings we recommend if performance is typically an issue for your PC:
Basic Settings:
- Field of View: 80
- Film Grain: Preference
- Chromatic Aberration: Off
- Depth of Field: On
- Lens Flare: One
- Motion Blur: Low
We kept motion blur, lens flare, and depth of field on because these settings can actually help hide lower image quality or lower FPS levels.
Advanced Settings:
- Contact Shadows: On
- Improved Facial Lighting Geometry: On
- Anisotropy: 16
- Local Shadow Mesh Quality: High
- Local Shadow Quality: Medium
- Cascaded Shadow Range: Medium
- Cascaded Shadow Resolution: High
- Distant Shadow Resolution: Medium
- volumetric Fog Resolution: Medium
- Volumetric Cloud Quality: Medium
- Max Dynamic Decals: High
- Screen Space Reflection Quality: High
- Subsurface Scattering Quality: High
- Ambient Occlusion: Medium
- Color Precision: Medium
- Mirror Quality: High
- Level of Detail (LOD): Medium
- Crowd Density: Medium
- Ray Tracing: Off
Because of the convenient Benchmark test option in Cyberpunk, we were able to test these settings compared to keeping everything on medium, and we saw barely any drop in performance. Feel free to tweak from here, but the above settings are a fantastic one-size-fits-all option for PCs that aren’t up-to-date with all the latest and most powerful software.
Best display settings for performance
These settings won’t have as significant of an affect on performance as the settings under the Graphics tab will, but there are still a couple specific things that can make or break your experience.
The best display settings for performance in Cyberpunk 2077 are:
- VSync: Off
- Maximum FPS: On—set this slightly higher than your monitor’s refresh rate
- Windowed Mode: Fullscreen
- Resolution: 1920×1080
- HDR Mode: See next section
The most important thing is that you keep VSync off if your PC has trouble running games on higher settings, as this setting is designed to match your FPS to your monitor’s refresh rate. If that’s difficult for your PC to do, it can actually make performance much worse.
Cyberpunk 2077: Best HDR settings
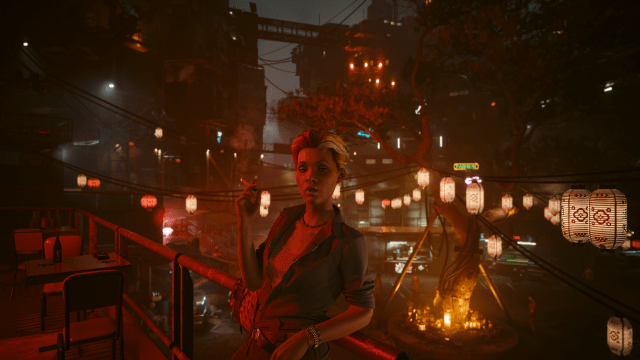
For HDR Mode, you’ll need a monitor that supports HDR. If you’re not sure whether yours does or not, it’s pretty easy to find out—Cyberpunk won’t let you turn on HDR Mode if your monitor doesn’t support the feature.
There are three different HDR settings that you can adjust in the game: Brightness, Paper White, and Tone-Mapping. For the most part, HDR settings are totally up to personal preference. They won’t have a significant affect on performance, but getting them just right can change your experience in the same way that altering a monitors display settings can.
- Maximum Brightness changes the overall maximum brightness level of the game. This doesn’t just mean that the game will be brighter all the time—it actually fluctuates with the time of day and light sources in the game. Turning this setting higher will allow for a greater dynamic range where brightness is concerned. You can actually search your monitor’s suggested maximum luminance, and use this number to decide on your Maximum Brightness level in Cyberpunk 2077.
- Paper White is nice and simple—it changes the brightness and intensity of all UI text and icons. This is totally up to user preference. If you want an intense and bold UI, turn Paper White up. If you want a less aggressive UI, turn this value down.
- Tone-Mapping Midpoint is a tricky one. This sets a sort of bell-curve for all brightness levels by deciding on an average Tone-Mapping level. Turn this too low, and dark areas will be pitch black. Turn this too high, and you’ll be squinting in sunlight. We recommend keeping this value somewhere between 0.45 and 0.9, but it is definitely a good idea to find an area where there are shadows and direct light sources near one another so you can test it out for yourself.
If you simply want a starter-kit HDR setup for Cyberpunk 2077, try using the following:
- Maximum Brightness: 300
- Paper-White: 60
- Tone-Mapping Midpoint: 0.6
It is very easy to make your game look weird with the wrong HDR settings. If you try these values and something looks off, refer to the descriptions of each settings above to figure out what is throwing the appearance off and how you can fix it.
Cyberpunk 2077: Best DLSS and AMD Sharpening settings
You can only turn one of these settings on, and we absolutely recommend doing so, as you can have a huge increase in performance with no perceptible trade-off. This is achieved by allowing your GPU to render frames at a lower fidelity and then retroactively sharpen them so that less GPU strength is needed, but the image still looks as clear.
- DLSS has five different options that range from maximum quality to maximum performance. Try each one out for yourself, or select Auto to automatically have this set to a level suited for your graphics card.
- AMD Super Resolution also has five levels that range from maximum quality to maximum performance and an Auto option to let your GPU make it’s own decisions.
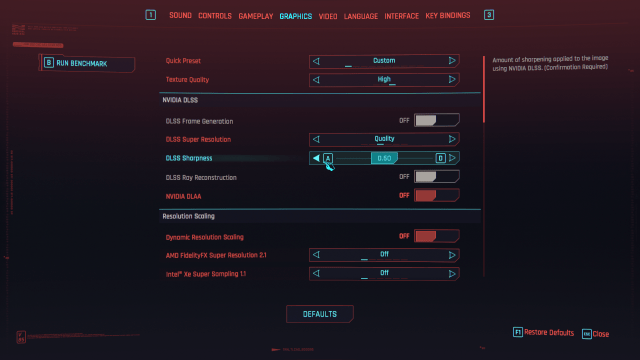
You should use DLSS if you have an Nvidia graphics card, and Super Resolution if you have an AMD Radeon card. Unless your monitor is 4k, you’ll be fine leaving the Sharpness level at 0.50.



Published: Oct 11, 2023 06:01 pm