
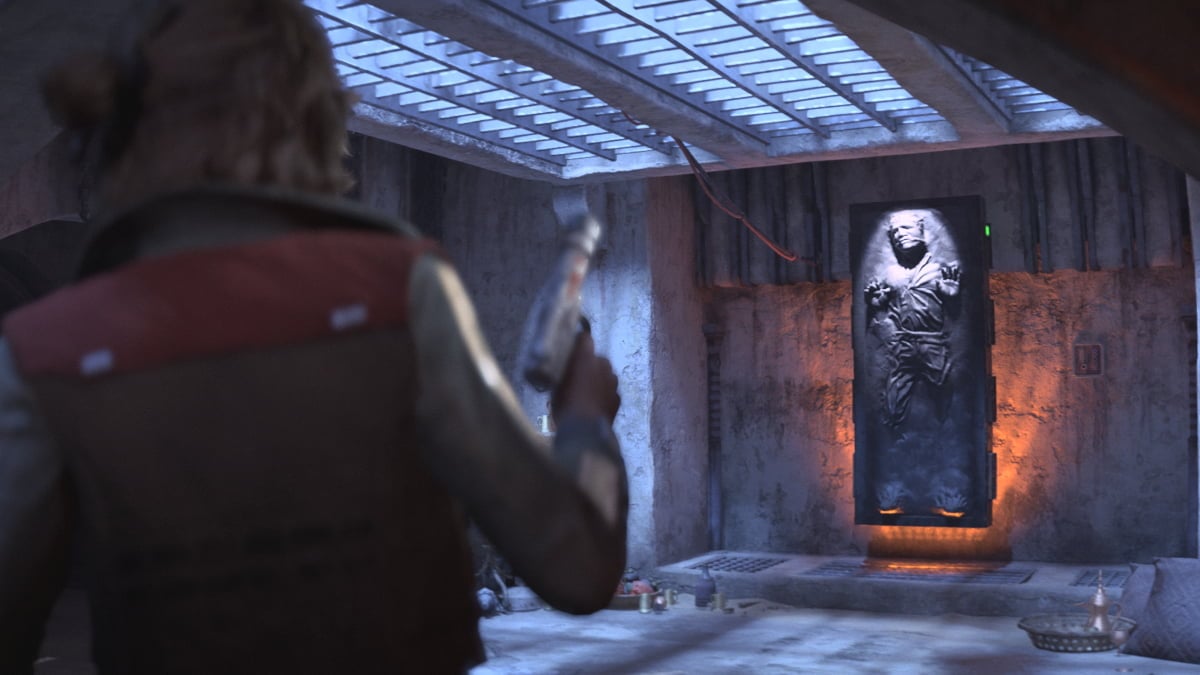
The Eno Cordova Lightsaber is one of the coolest cosmetic items players can unlock in Star Wars Jedi: Survivor. It’s located in a secret room below Wayfinder’s Tomb, which sounds easy enough. To access that room, however, you’ll need to complete a specific list of prerequisites—The Path of Restoration, The Path of Persistence, and The Path of Conviction in Arid Flats. This is known as the Wayfinder’s Tomb puzzle.
It’s not too difficult to complete, but it can be time-consuming in any Survivor playthrough if you don’t know where to find each path and how to do them. It’s worth it for the Eno Cordova Lightsaber, though.
How to complete the Wayfinder’s Tomb puzzle in Star Wars Jedi: Survivor
The Path of Restoration
Starting from the Meditation Point at Anchorite Base in Arid Flats, hop on the nearby Spamel on the left and head towards the Desert Ridge until you reach the location pictured below. Climb the wall and jump over the ledge. You’ll know you’ve made it to the right spot because the location will say The Path of Restoration.

Then, follow these steps:
- Jump over the gap on the left, then turn right and jump to climb the rock with the Stormtrooper standing on top.
- Dispatch him, then scale the gap by jumping and Wall Running.
- You’ll see the first marble on this platform. Use Force Push on it to move it down. This will change the path the second marble can take.
- Wall Run back to the previous platform the Stormtrooper was standing on and look in the opposite direction from where you came. You’ll see the second marble. Force Push it to unlock a hidden vertical path near the first platform you started from.
- Head back to that platform and climb the vertical path, which will lead you into a cave with the third marble inside.
- Force Push the third marble, then return to where the second one moved to just below and Force Push that one back to its original position. Do the same for the first one, too, which can be done from the platform the Stormtrooper was standing on.
- If you’ve done it correctly, you’ll see the course the second marble can take will change. It will run up the mountain. Force Push it and send it up there.
- Go to the platform the first marble was on again, but this time, climb the platform nearby that has a zipline on top. Dispatch the enemies, then take the zipline and Force Push the final marble on top to complete The Path of Restoration.

The Path of Persistence
Starting from the Meditation Point at Anchorite Base in Arid Flats, follow the cliff ledge on the right and take the zip line until you reach the location pictured below. You’ll know you’ve made it to the right spot because the location will say The Path of Persistence.

Then, follow these steps:
- Climb up the first rock, then use grapple to sling up to the platform above.
- Turn right and enter the gap, use grapple again to sling across to another platform, then jump over the gap.
- Walk a little bit more until you see the first marble. Use Force Push on it, causing the wall below to move in the process.
- Enter the gap behind where the wall moved, drop down, activate the zipline nearby, and take it. This will lead you to another platform.
- Use grapple to reach the platform above, where you’ll see the second marble. Use Force Push on it to send it up the cliff.
- Drop back down to the platform you came from and take the zipline back. Then, grapple to the rock above, and jump and dash your way into the little opening behind the rocks to your right.
- Force Push the marble in that room back to its original position, causing the wall to move again. Then, head through the gap that opens up on the left.
- Wall Run along the cliff on the left, then jump and grapple your way up the vertical part. Doing so will put you at the very top of the mountain.
- Dispatch the Stormtroopers and Droids and use Force Push on the final marble, bringing an end to The Path of Persistence.
The Path of Conviction
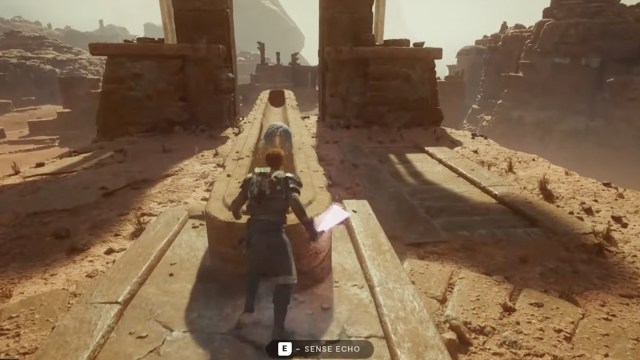
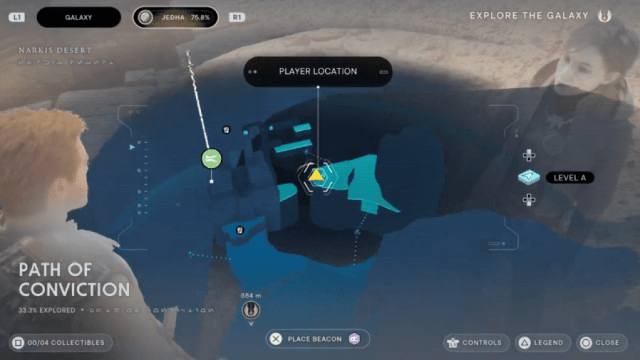
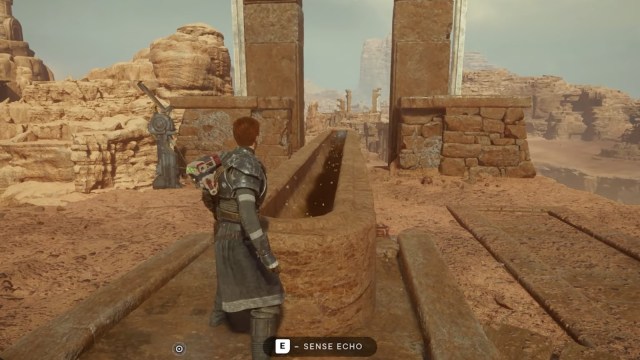
Starting from the Arid Flats Meditation Point, climb down the rocks above, mount a Spamel, and make your way to the location pictured below. You’ll know you’ve made it to the right spot because the location will say The Path of Conviction.
Then, follow these steps:
- Grapple onto the floating platform in the middle of the gap, then jump over the second half of the gap.
- Walk forward a bit, then turn left. You’ll see the first marble. Force Pull it toward you, grapple onto the floating platform nearby, then jump toward the platform near the cliffside that moved.
- Look down to see the second marble. Force Push it, causing a rocky platform on the right to move out of the cliff. Grapple back onto the middle platform, then jump back down to where the first marble was.
- Force Pull the first marble toward you, then grapple onto the floating platform again, then turn right and jump down the platform below.
- Look up and Force Push the third marble to the new platform above you, then Force Push the second marble in front of you back to its original position.
- Jump back on the floating platform, then jump to where the second marble returned to. It should now have a new trajectory embedded into the cliffside. Force Push it to send it upward.
- Immediately after, turn left from where the second marble was and jump over the gap down to a cliff below while staying close to the wall on the right-hand side.
- Grapple onto a floating platform nearby, then jump toward the next floating platform and grapple onto it too. From there, jump to the area with multiple enemies, dispatch them, then look left and grapple onto the climbable area of the cliff above.
- Climb it until you reach the top, make quick work of the enemies above, the Force Push the final marble, completing The Path of Conviction.
Where to find the Eno Cordova Lightsaber in Star Wars Jedi: Survivor
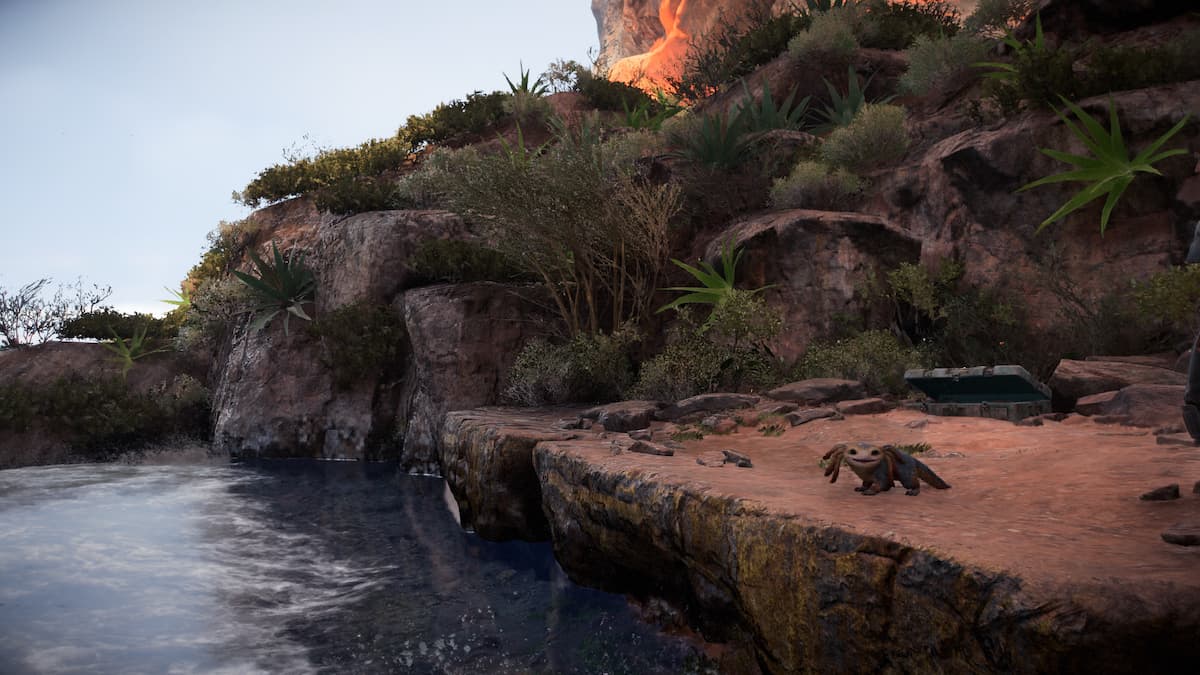
After completing The Path of Restoration, The Path of Persistence, and The Path of Conviction, and in turn, the Wayfinder’s Tomb puzzle, all that’s left to do is find the Eno Cordova Lightsaber. To do that, head to the Wayfinder’s Tomb which can be found at the location pictured below.

As for the specifics, make your way to the top of the tomb, then use the elevator to access the hidden room below. In there, you’ll find the chest with the Eno Cordova Lightsaber. Now, you can finally enjoy it during your Star Wars Jedi: Survivor adventure.


Published: May 1, 2023 10:59 pm