While this is one of the toughest mating patterns to remember when you’re a newcomer to chess, it’s not one to dismiss. Understanding the coordination between a bishop and knight can be a very useful skill to have in mid-games and end-games, and this does actually come up in practical play, even at the highest levels!
When you only have a bishop and a knight against a lone king, you’ve got a decisive advantage—and if your opponent doesn’t resign, you also have a heck of a challenge ahead of you. In practice, it occurs in around 0.02% of games—but even the best players in the world can struggle with it if they haven’t done their homework.
The technique below is guaranteed to work and you do have a chance to plot it out over the board, but it’s easier to have it nailed down by that time thanks to some practice in the comfort of your home.
To get started, let’s visualize the checkmating position you’re going for. As with other checkmates, the enemy king has to be forced to the side of the board, then into the corner. Since you only have one bishop, you can only deliver mate in the corner that is the same color as the squares it can access.
So you’re looking at something like this:
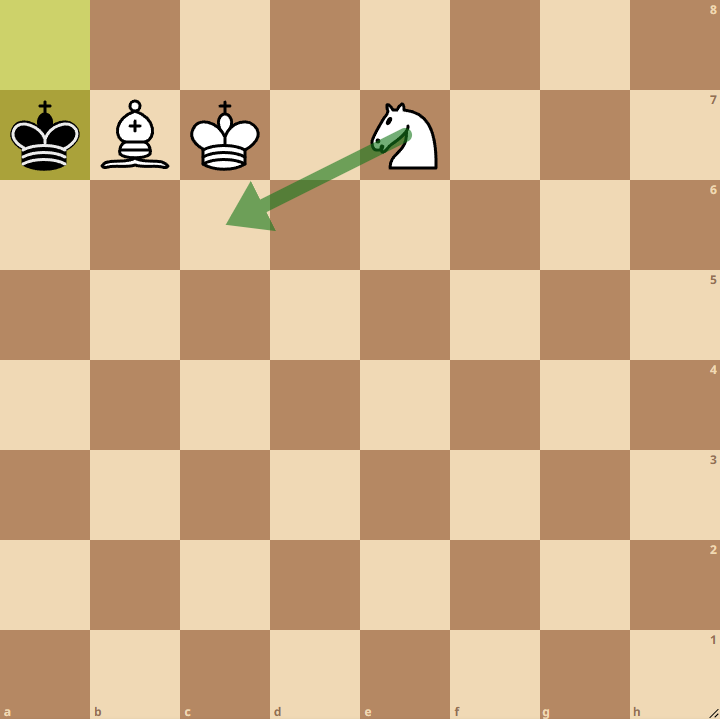
To get there, you need to force the enemy king to the side of the board first. To do so, you’ll need to coordinate your pieces. The bishop can only lock down one set of colors, meaning you’ll need the knight to deal with the rest. Any holes left will have to be covered by your king.
Think in triangles. This is the first one:
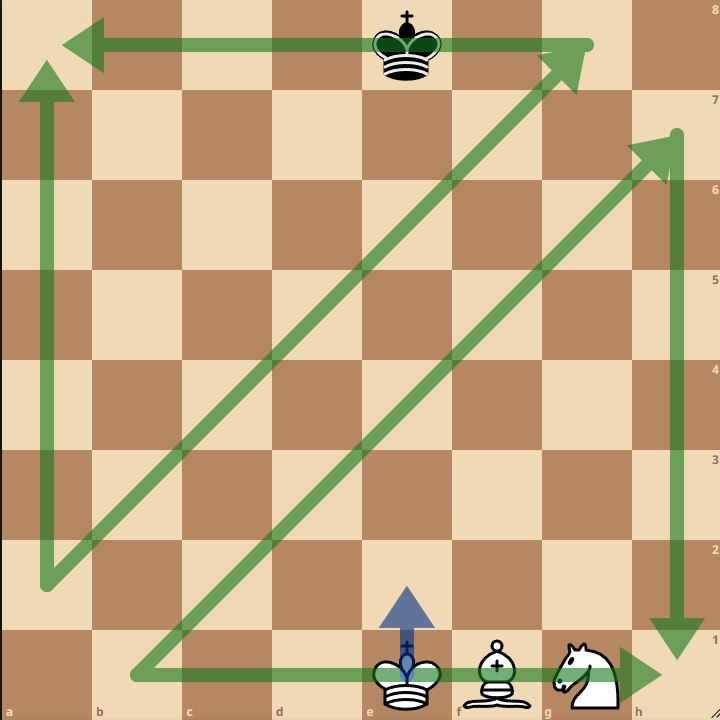
Try as Black might, they can’t stop you from forcing them into one of these triangles, even if they try to flee into a corner first. Restrict their movement with the king and the bishop first, then hop in with your knight to cover the rest of the squares.
This should get you to a position like this:
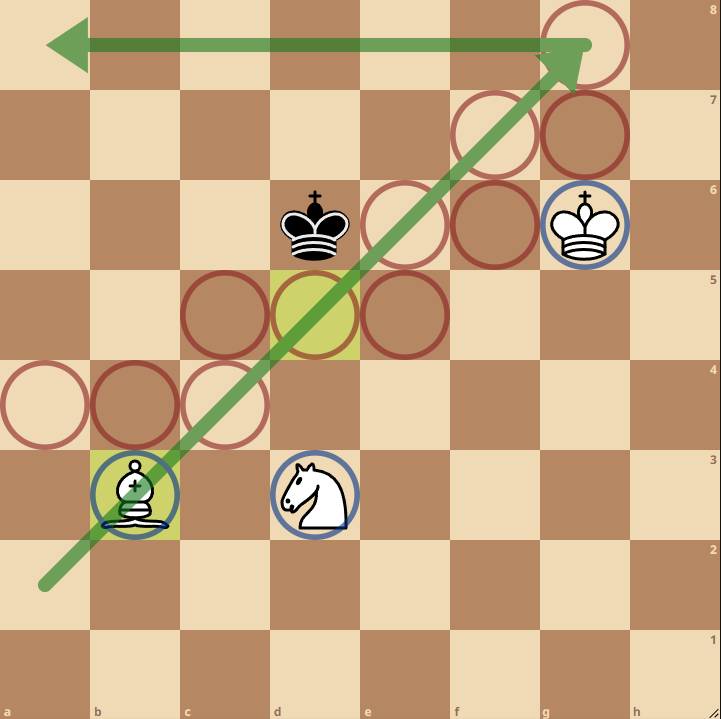
At this point, you might be wondering “why the hell should I bother with this when my opponent will just resign anyway?”, and, well, they might not. This may be the case at the highest levels of play as well! Take a look at this game at the recent Chess Olympiad between two Grandmasters. Yes, your eyes aren’t deceiving you: it’s this exact mating pattern on the board.
Or how about this time, when the women’s world chess champion failed to deliver this very checkmate in Geneva?
Let’s persevere and do better.
Now, for, the second triangle:
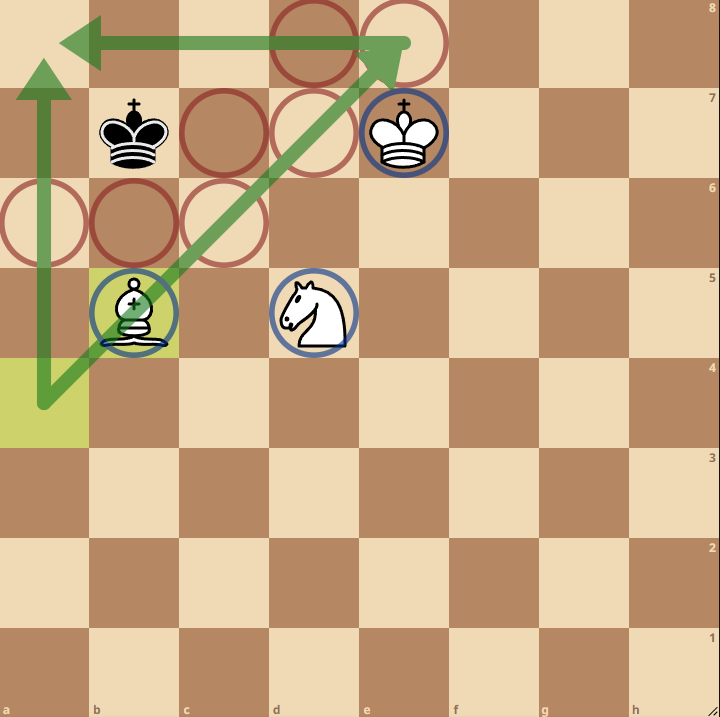
Then, the third and final triangle: Black is now cornered.
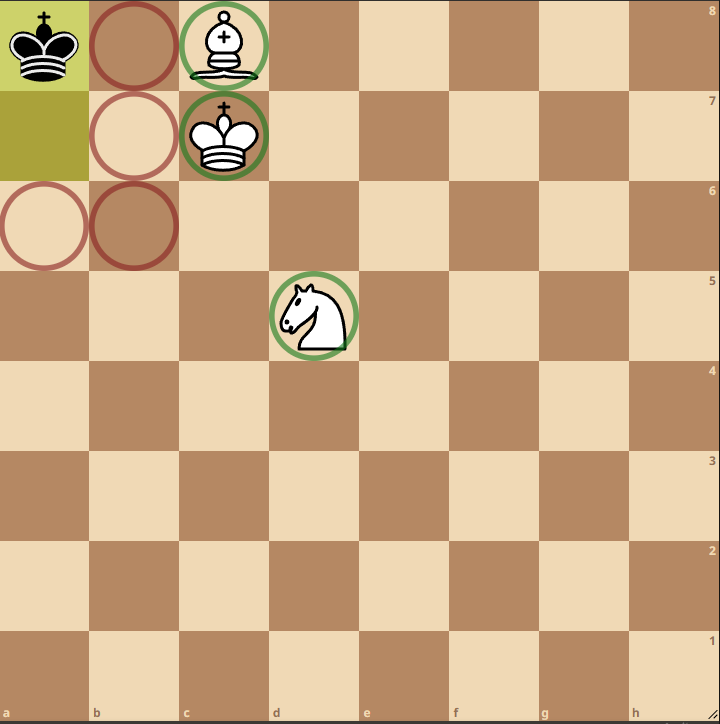
Now for the checkmate. Remember the position we were aiming for: the bishop and the king stalemate the king as the knight gallops in to deliver the mate. This requires giving up a tempo with the knight. Here’s what it looks like:

There you go!
Try this interactive tutorial for more practice against the computer if you feel stuck.




Published: Aug 30, 2022 10:02 pm