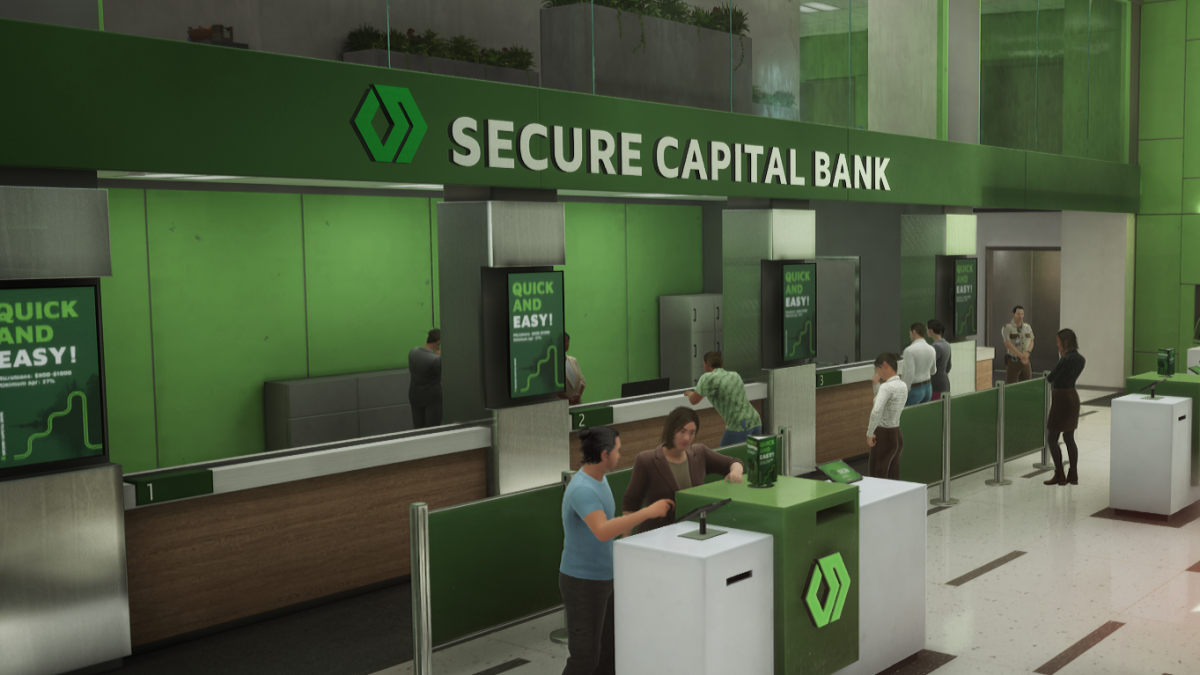
The first heist in Payday 3, No Rest for the Wicked, is a classic daylight bank robbery, and trying to complete No Rest for the Wicked without breaking stealth is a thrilling challenge.
The heist is a semi-challenging return to form for people who played the second game, and a trial by fire introduction for brand new players. But no matter your experience level, it’s great fun.
In this guide, you will be shown a step-by-step method for sneaking, hacking, and charming your way to the vault in No Rest for the Wicked. You won’t have to harm a fly.
Payday 3: No Rest for the Wicked stealth objectives
To stealth your way through No Rest for the Wicked, you must complete the following checklist:
- Find the red and blue keycards
- Disable the security system
- Turn off power to the gate
- Flip the correct color-coded vault gate switch
- Find a bank executive to learn the potential vault codes
- Use your blacklight to determine the correct code
- Empty the vault without being seen
- (Optional) find the executive’s deposit box
It’s a fairly straightforward heist, and so long as you’re careful and meticulous you should have no trouble completing No Rest for the Wicked using stealth.
Read on for a breakdown of each stealth objective. The sections below will be listed and explained in chronological order of how they should be done in the heist.
Payday 3: No Rest for the Wicked full stealth walkthrough
Where to find the red and blue keycards in No Rest for the Wicked
These keycards are very easy to find, and doing so should be your first goal in No Rest for the Wicked. From the front of the bank, enter the parking lot on the left. In the parking lot, there is a locked door that leads to the back hallway, as well as a gate that leads to the roof. These two entrances are best used for finding the keycards.
First, lockpick the door to the bank in the parking lot (taking care that the guard doesn’t see you). Once you’re in, wait in that first room for a guard to walk by and stand outside of the vault gate. There are two possible spawn formats in this heist, so this guard will either have the red or blue keycard, but that doesn’t change our steps. Steal whichever one he has from his belt, and go back outside.

Now, lockpick the gate at the back of the parking lot and head up the fire escape to reach the roof. From here, enter the bank’s stairwell and wait at the door of the second floor, where a guard with the second keycard will eventually walk past, allowing you to swipe it from his belt.
Of course, the red and blue keycards can also be acquired by entering the hallways and finding the guards, but if you do this you’ll have to be considerably more stealthy.
How to disable the security system and shut off power to the gate in No Rest for the Wicked
Now that you’ve got the red and blue keycards, this next step is easy. First, go back to the roof. On the opposite side from where you entered the stairwell, you may see the red keycard door. It can also spawn on the second floor, so if it isn’t on the roof, it’s on floor two next to the little kitchen area.
If it’s on floor two, I recommend taking out the security cameras using the blue keycard before continuing. Don’t mask up just yet, as you’ll want to find the blue keycard room first. This room is always on the second floor, and is usually to the right of the stairwell entrance to the hallway. It will always be easily found by circling the hallway on the second floor.

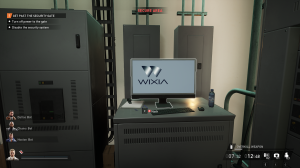

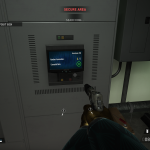
Enter the blue keycard room and take down the guard inside. This will make everything else much easier as security cameras are no longer an issue. Now, enter the red keycard room (on floor two or the roof) and disable the security system by hacking the computer.
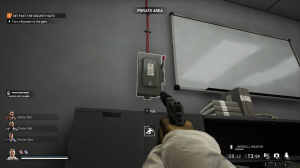
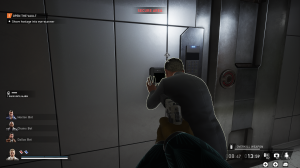
After you’ve done that, find the power fuse box on floor two in the copy machine room next to the cubicles. Flip the switch on the fuse box to turn off the power. While you’re here, search one of the highlighted files to start the executive deposit box side objective. If the fuse box isn’t here, check the IT/Help Room on the first floor. It’s rare, but it can also spawn there.
How to flip the right switch in No Rest for the Wicked
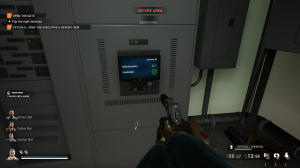
Now that the power is off and the security system is out, you’ll need to learn which switch unlocks the gate. Return to the red keycard room where you hacked the terminal. On the wall, a Cable Controller will now be highlighted, and activating it will give you a color and circular pattern. This color and pattern will match the one you must select on the vault gate to unlock it.
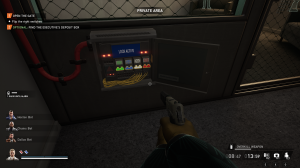
I recommend going back to the roof and down the fire escape, as the door we entered from the parking lot puts us directly next to the vault gate. Open the gate’s lockbox and select whichever color you saw on the Cable Controller in the red keycard room.
The gate will open, and you now need to learn the code to open the vault.
How to open the vault in No Rest for the Wicked
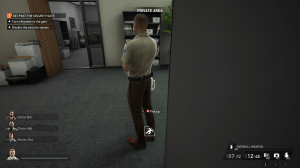
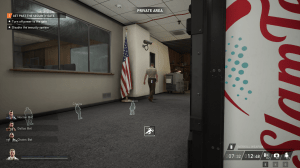
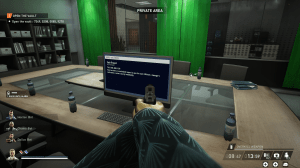
You’ll need a bank executive to bypass an eye-scanner at the vault door. On the first floor, you’ll find the Manager’s Office right next to the IT/Help Room and across from the Conference Room. Pick the lock, and once inside, you’ll need to mask up to take the bank executive hostage. Note that the files in this room usually reveal which deposit box belongs to the executive.
Bring the manager to the door of the vault, and shove him into the eye-scanner. An email will be sent to the computer in the Conference Room, and hacking that computer will give you four possible codes to open the vault. If the files in the Manager’s Office didn’t reveal which deposit box belongs to the executive, the files in here should.
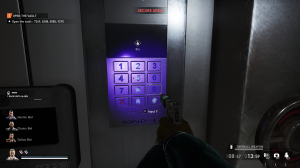
At the door of the vault, looking at the pinpad will automatically activate your blacklight, which will highlight four numbers. All you need to do is determine which of the four possible codes use those highlighted numbers, and then input them in that order. Doing so will open the vault in No Rest for the Wicked.
Throughout this whole stage, you’ll need to be masked up, which means civilians will raise an alarm if they see you, regardless of whether or not you’re trespassing. There are multiple work-arounds, but I personally find using the stairwell, fire escape, and windows to move around to be the best option. I also suggest tying up and hiding all civilians from the first floor, as this will reduce the variables greatly.
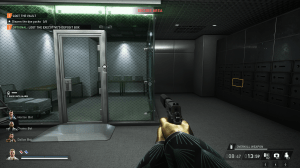
How to loot the vault without being detected in No Rest for the Wicked
There is a very convenient route for doing just this. First off, you must disarm all of the dye packs in the vault as quickly as possible to prevent any money from being ruined. Once this is done, money can easily be hauled straight to the getaway van, which is parked out front. The red door next to the IT/Help Room leads to the alleyway on the right side of the bank, which is right next to the getaway van.
Be careful about civilians on the street seeing you move from the alleyway to the van. If you’re spotted in the street, there is pretty much nothing you can do to keep the alarm from being raised. So long as you’re a little patient, this should be no problem. Load the money up, and make your escape. Congratulations! You’ve now completed No Rest for the Wicked using stealth.
Which guards to take down in No Rest for the Wicked
This is up to personal preference, but because there is a limited number of guards you can eliminate before an alarm is raised, you’ll want to choose wisely. I recommend:
- The guard in the security camera room. The whole bank executive stage is nearly impossible if you haven’t taken out the security cameras.
- The guard in the alley to the right of the bank. This guy’s patrol route is pretty much just the route from the bank to the getaway van—he will be very difficult to sneak past with the money.
- The guard in the first floor hallway. This guard patrols between the vault, the Conference Room, and the Manager’s Office. He is an absolute menace.


Published: Sep 25, 2023 04:33 pm