After completing the second encounter in Destiny 2’s Sundered Doctrine dungeon, the worst is behind you, and you can go through the next traversal area until you reach the third encounter and are ready to face Kerrev, the Erased.
Here’s a complete guide to the third and final encounter in the Sundered Doctrine dungeon in Destiny 2.
Table of contents
How to open the door to the third encounter in Sundered Doctrine in Destiny 2

Much like before the second encounter, you must solve a small puzzle as you approach the third. In a large open room with multiple lenses, there are two dials with symbols (Worm and Enter) and two starting points with corresponding symbols. Your goal is to connect the starting point with the dial.
Pick up the lenses, install them in free slots, then shoot the switches at the starting points to fire the beams and adjust the lenses accordingly. The Enter beam should go clockwise around the room, while the Worm should go counterclockwise.
Destiny 2 Sundered Doctrine third encounter overview

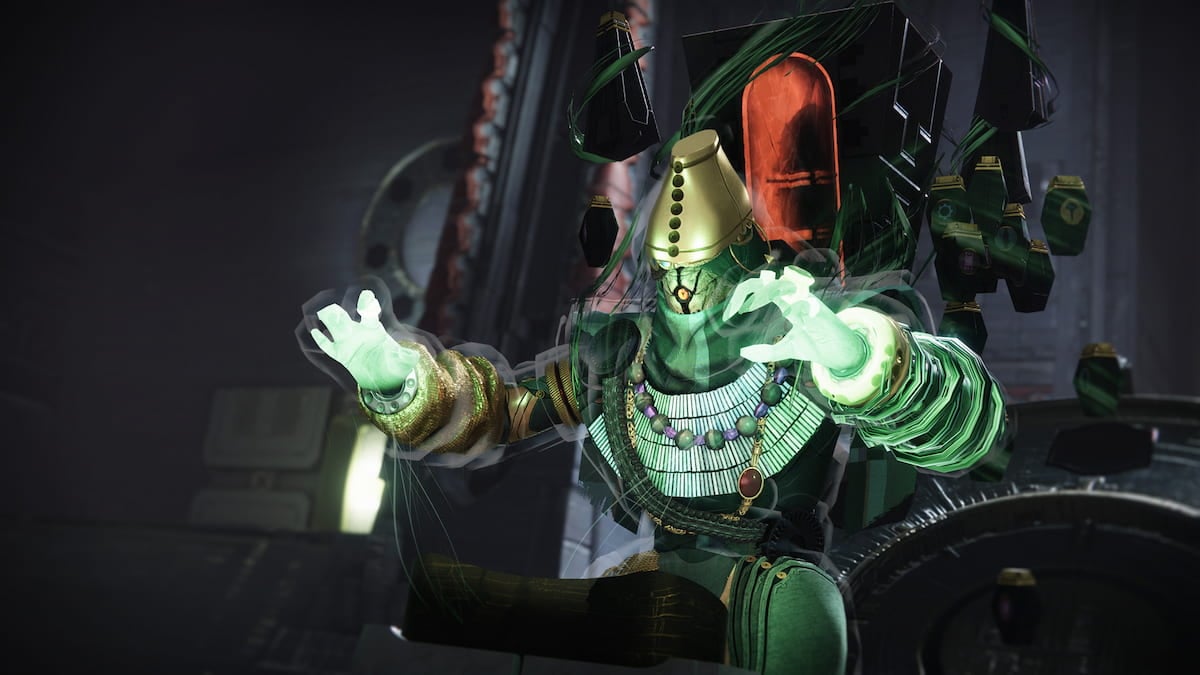
The final encounter goes back to the concept of truths and lies we’ve seen in the first encounter. There’s a main dial behind the boss in the main room, which shows six symbols.
There are also dials with individual symbols around the main room and the two adjacent rooms. You can enter the left room by shooting the door on the left and get into the right room by jumping on a piece of wall sticking out on the right.
Here’s a table of rooms and what symbols they have:
| Left room | Middle/boss room | Right room |
|---|---|---|
| Pyramid Hive Traveler Guardian Witness | Drink Kill Worship Stop Give | With Queen Worm Darkness Light |
There are also lenses that can point at each symbol. The lenses you can rotate are suspended with Strand. To get rid of the suspension, kill the Stasis psion-looking Dread (this gives you a buff) and shoot the darkness splinters around the lens.
The main mechanic is to use the lenses in each room to select the symbols, depending on those displayed on the main dial.
How to beat the third encounter in Sundered Doctrine in Destiny 2

When you start the encounter, the main dial will display six symbols. Mentally, split the dial down the middle. You have the left three symbols and the right three symbols. One side tells the truth, the other a lie. Your objective is to use the lenses across all rooms to select the lie.
If you’re somewhat familiar with the Destiny 2 lore, you can tell which one is a lie by reading the symbols. Guardian Worship Traveler, for example, is a truth, which means the other side is a lie. If you don’t know which is which, find the Truthspeaker in one of the rooms. Truthspeaker drops a symbol involved in a truth, so you must select the other side.
Here are the step-by-step instructions to beat the Kerrev, the Erased:
- Start the encounter and read the symbols on the main dial.
- Go around the rooms to select the lie and deselect the truth (find and kill the Truthspeaker if needed).
- Activate the main dial.
- Hide behind any of the pillars to survive the burning attack.
- Deal damage.
- When the boss makes a stomping attack, hide behind a pillar again.
- Rinse and repeat until the boss is dead.
The fastest approach is to send a player to each side room and have the third player stay in the middle room to read the symbols (and adjust any of the middle symbols). After you defeat Kerrev, the Erased, the chest will spawn at the back of the room. Keep an eye on the symbols on the back door, as they might come in handy as you discover the pyramid’s secrets.


Published: Feb 10, 2025 06:00 am