Cities: Skylines 2 gives you even more ways to customize your ideal city than the first Cities: Skylines. However, many of the game’s tools and options take a bit of getting used to, and you may not realize you can build certain things—like Quay roads, for instance.
So, are Quay roads available in Cities: Skylines 2?
Can you build quay roads in Cities: Skylines 2?
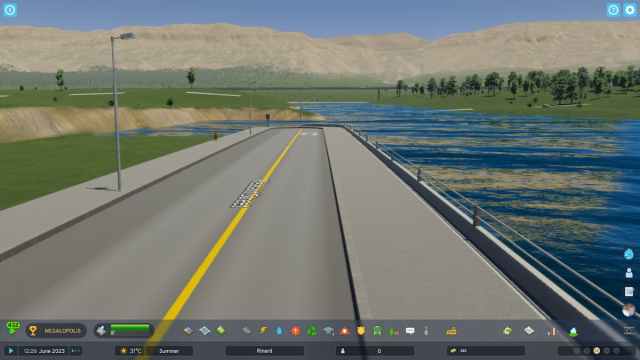
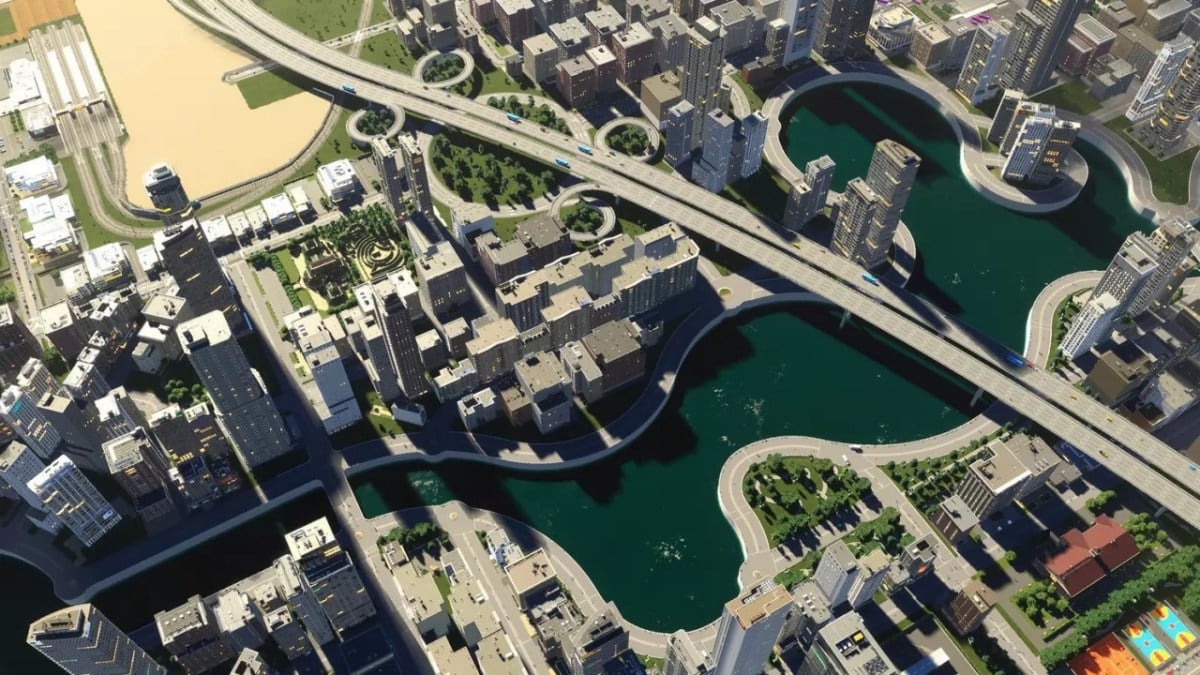
Yes, you can build Quay roads in Cities: Skylines 2. Quay roads are elevated or walled roads that circle the edges of a body of water, like a lake or river.
It’s not as simple as picking a road and placing it on the map, however. Quay roads require a little terraforming to get right.
How to build quay roads in Cities: Skylines 2
To build quay roads in Cities: Skylines 2, pick or create a map with a river or two and find a nice shore where you can build your new quay road. I like to find a nice and lengthy shore so my citizens can enjoy a long, relaxing walk beside the beach. After you pick a shore, here’s what you need to do.
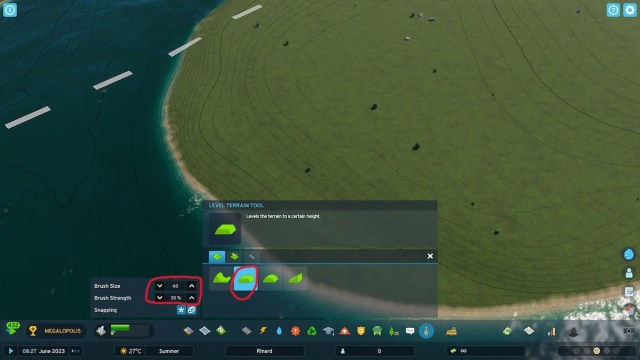
- First, save your game. You’re about to do some terraforming, and it’s quite easy to mess up and create Mount Everest instead of a nice flat road. So, make a backup save and reload in case you mess up.
- Click on the little shovel icon from the bottom menu. This is the terraforming tool.
- Select the Level Terrain (the second option that looks like a 3D trapezoid). This is essentially your ironing tool for your shore. You need to create a flat surface by the shore to place roads.
- Before you start terraforming, reduce the brush size and the strength. I like to make just enough flat surfaces around the shore to build a road and maybe a few residential zones opposite the shore. However, feel free to pick whatever works best for you.
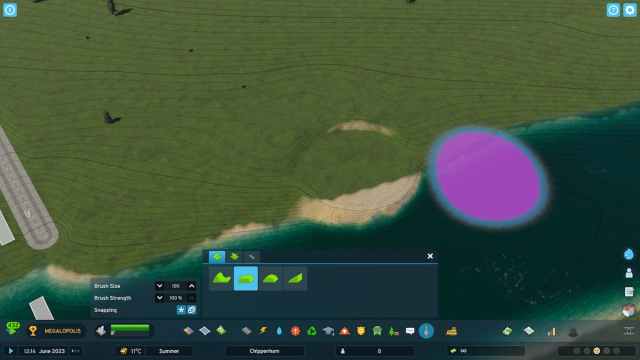
- Click on a piece of land right next to the shore and make sure your terraforming circle is also touching the water. If you did it correctly, you should have a flat circular part like in the image above.
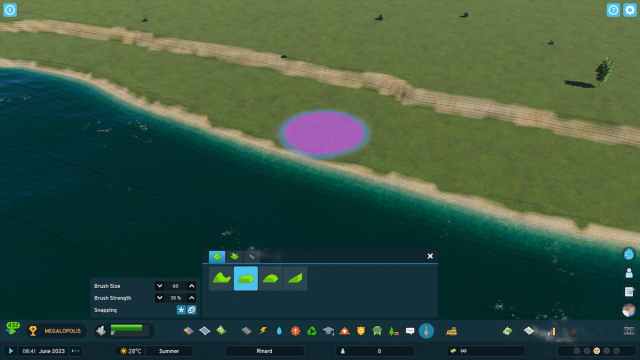
- Now, from your new flat circular spot, start ironing. It’s important for you to start from the newly created circle because the game will know what the optimal height for your terraforming should be. It’s better to click and hold as much land as you can in one go than to constantly click around because you can mess up your height and create a mountain instead of a flat road. Reload your save if you mess up, but if you did everything correctly, you should have a surface that looks similar to the image above.
- Time to place some roads. Click on the road icon and pick the first road option.
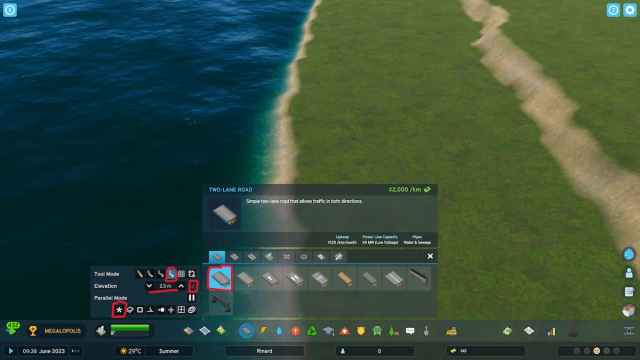
- Before you start placing roads, you really should adjust their elevation. So, set it at about 3.00m or higher or lower. I place mine at 2.5m. Make sure the elevation bar only has one line (kinda looks like a mobile phone signal strength)
- Turn off ALL snapping. For the love of everything that is good, turn it off. This will save you so much headache. The game thinks it knows exactly what you want, but this is a nightmare with quay roads. So, just turn everything off by clicking on the little star just under the Parallel Mode (the word, not the button).
- Click on the squiggly road icon, the fourth one from the left. This will make things a lot easier later.
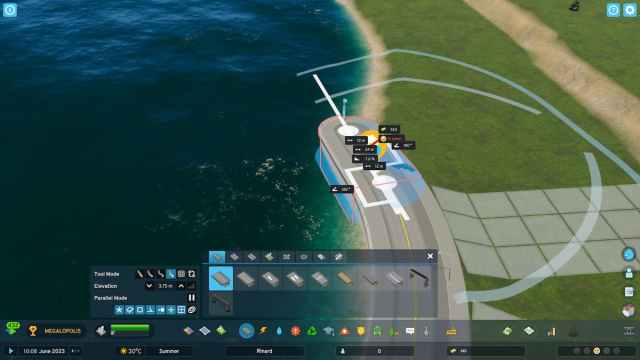
- Now, start placing roads as close as you can to the shore. However, instead of placing them in one go, place them bit by bit. The reason for this is so you can avoid placing regular roads by accident. Make sure each bit has rails on one side. This is why we used squiggly roads and turned off snapping.
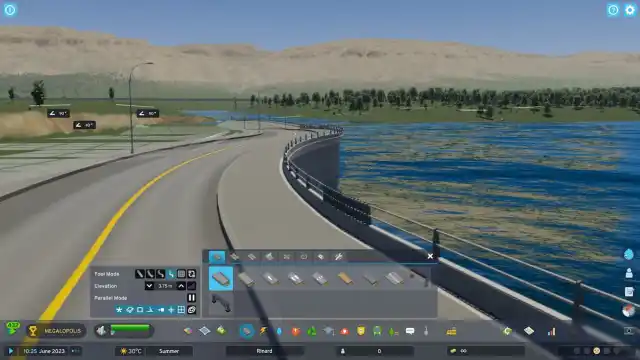
- If you did everything correctly, the roads should have rails on the beach side and should be pretty close to the edge of the water, like in Image Six. Snazzy, don’t you think?
- Bonus: Go back to the shovel tool, but this time, select the Soften Terrain tool (the third one that looks like a little curved hill). Use this tool to trim any ground hedges next to the quay.
And there you go. Have fun making quay roads. Of course, no quay roads are complete without bridges, so you should consider learning how to build bridges, too.




Published: Nov 3, 2023 09:36 pm